VuePress is a Vue-powered Static Site Generator. It was originally created to support the documentation needs of Vue sub projects. It’s got a nice default theme that’s well designed for documentation sites, and it can handle your blog in a pinch too. The main reason I’m excited about VuePress is that you can easily add any .vue components you want directly to your Markdown, making it simple to add custom UI to your site/blog.
To get started, first make sure you’ve got your Node development environment setup. And for this tutorial I’ll use Yarn as our package manager, so make sure you’ve also got that setup in your development environment.
Now we’ll start with a simple Hello World site. I used the VuePress Getting Started as my reference, but got a bit tripped up by the Quick Start which uses vuepress-site because it created a directory structure that didn’t quite match up with the rest of the documentation. So instead, I followed the Manual Installation (details below).
Get Started
Create and change into a new directory:
mkdir vuepress-starter && cd vuepress-starterInitialize with Yarn:
yarn initYou’ll be prompted with a number of questions about your project, which will be used to create your package.json. You can accept the default name (vuepress-starter)and version, give your project a description, accept the default entry point, leave the repository url blank, put your name in as the author, accept the default license, and set private to true since you don’t want this package to be accidentally published to the public package registry.
Next, install VuePress into the project:
yarn add -D vuepressCreate your first markdown document (README.md will always be served up as index.html, which is the default document for your site):
mkdir docs && echo '# Hello VuePress' > docs/README.mdAdd two scripts to the package.json file in your vuepress-starter directory, which should now look similar to this (don’t forget the comma at the end of the devDependencies block:
{
  "name": "vuepress-starter",
  "version": "1.0.0",
  "description": "VuePress Starter",
  "main": "index.js",
  "author": "Jake",
  "license": "MIT",
  "private": true,
  "devDependencies": {
    "vuepress": "^1.7.1"
  },
  "scripts": {
    "docs:dev": "vuepress dev docs",
    "docs:build": "vuepress build docs"
  }
}
Great! If everything’s working you should now be able to start up a local development server:
yarn docs:devWhile this server is running, you can preview your site at http://localhost:8080 and any changes you make (e.g. editing README.md) will automatically be reflected in the live preview. You can stop your sever at any time by hitting Ctrl-C.
Deploy to DigitalOcean App Platform
Now that we’ve got our site running locally, let’s deploy it so it can be viewed by the world. In this tutorial, we’ll use DigitalOcean App Platform for free static site hosting, but any static site hosting service could be used. In addition to a DigitalOcean account, you’ll also need a Github account.
The first step is to create a new Github repository for your site, but you can skip the recommendation to “initialize this repository with a README.” In this example, we named our repository vuepress-starter.
Once you’ve created this repository, you can push your local vuepress-starter directory to it. To do this, make sure you have git setup on your local machine and then run these commands from your project directory (vuepress-starter):
curl -o .gitignore https://raw.githubusercontent.com/github/gitignore/master/Node.gitignore # gets the latest .gitignore template for Node projects from Github
git init
git add .
git commit -m "first commit"
git remote add origin https://github.com/<your-org>/<your-repo>.git
git branch -M main
git push -u origin main
Perfect. Now you’ve got your site’s code committed to the Github repo you created earlier. App Platform makes it easy to connect you Github account and deploy a site or application from any of your repos. Let’s do that now.
Visit https://cloud.digitalocean.com/apps and click Create App. When prompted, configure your Github authentication and grant the DigitalOcean app access to all repositories or to just this tutorial repository (vuepress-starter). Note: if you only grant access to a single repository you’ll need to go through Github authentication for every future repository you want to deploy.

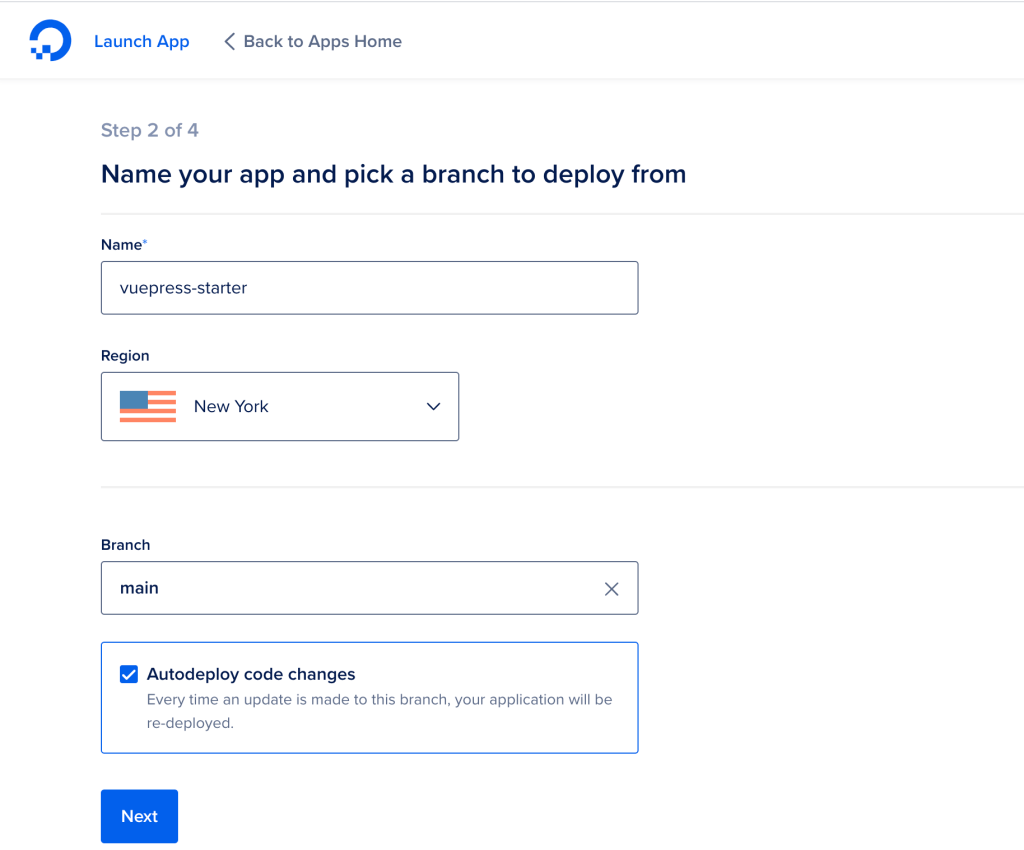
You can leave all the defaults on Step 2 unchanged. One of the most interesting options is “Autodeploy code changes”; when selected, this will let App Platform automatically redeploy your site whenever the main branch of your Github repository is updated. App Platform will perform the redeployment with zero downtime, and will automatically prevent deployments if builds don’t work:
On Step 3, you’ll need to set the type to “Static Site” and add the following build command:
yarn docs:build
This command translates your site into static files and saves them in docs/.vuepress/dist. So we also need to update the Output Directory in this step to point to docs/.vuepress/dist.

On Step 4 you’ll see the cost for running this app on DigitalOcean, which should be $0 for the first three Starter apps you run. Now you can click “Launch Starter App” to get your site live.
You’ll see a status bar appear during the build, and you can click “View Logs” to see more details as the build progresses.

Once the deployment completes successfully, you can view your site by clicking “Live App” or by clicking the vuepress-starter-xxxxx.ondigitalocean.app link.
Now you have a complete local and remote development environment setup. To make changes to your site, make edits locally while yarn docs:dev is running and review the changes at http://localhost:8080. When you’re happy with your changes you can add, commit, and push them using git. Every time there’s an update to the main branch of your vuepress-starter repository on Github, your live site will automatically deploy on App Platform. As you move on to more frequent or advanced development on your site, you can use the Github flow approach to keep things clean and you can learn more about VuePress in the guide.

Leave a comment